Recent Posts

Showing posts with label party. Show all posts

Friday, February 3, 2017

BROOKES POP UP PALM PARTY

I'm at home on a rainy day off and decided to #flashbackfriday a blog post. This summer we celebrated my niece Brooke's birthday in Florida. 

The theme was 
HEALTHY HAPPY HOUR.

The idea to lay the finger foods on palm fronds came from my friend Michelle who shared this traditional  Filipino dining experience with me! 
I packed a few lightweight essentials like this celebrate banner, napkins, and place cards. 

 FRUIT PIZZA
My good friend Mel jumped at the chance to make these fruit pizza's, she did an amazing job, 
so yummy. 
Learn how to make one here!
CHALK is easy to pack and everyone was able to share well wishes for the birthday girl right on the table runner (black wrapping paper).
You can get a similar "celebrate" banner here!

I packed some chalk and some chartreuse tissue paper to make faux lettuce for table top decor. Learn how to make them here!
You can purchase the chartreuse tissue paper here!

I enlisted my mother to make us all crowns out of palm leaves, she is so awesome. Learn how to make one here!


My sister managed to find some cool accessories to set up a martini bar for the grown ups.
We added Palm fronds and leaves everywhere for accents.
SO CUTE.


These cute Meri Meri place cards from Paper Source not only had our names on the front, but on the back they had interesting trivia about each party goer. The person whose name was on the card had to ask  others "who in this room..."
Whether it was "...has flown a plane" or "...has been to Dubai" it  lead way to laughter and great conversation!


Pin It

Saturday, October 3, 2015

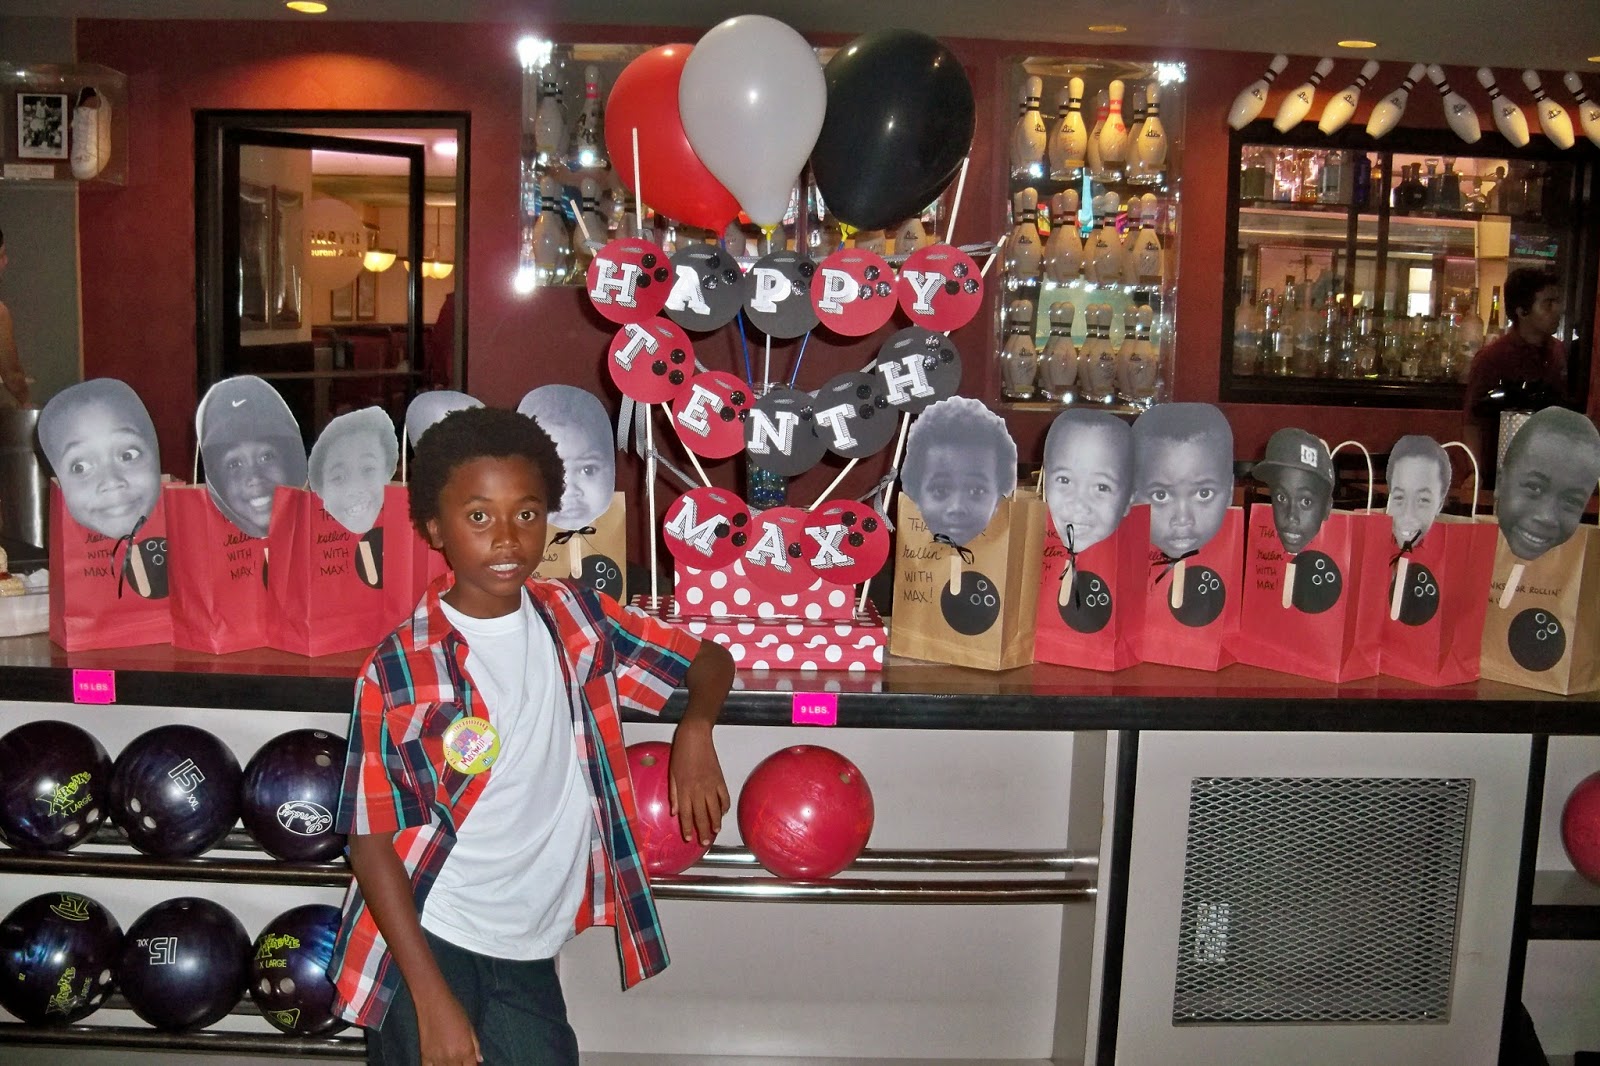
THIS IS HOW WE ROLL BOWLING PARTY


 You need popsicle sticks, card stock or cover stock paper from *Paper Source and double sided tape to put these cute photo props together. We had the kids guess what age Max is in each pic from 1 to 10!


Rice Krispie Cakes are easy and fun to make, the licorice gave me a hard time this year because it wasn't sticking to the butter:( Just as yummy in the end!


Pin It

Tuesday, August 11, 2015

POP UP PARTY IN JAMAICA


Such a fun milestone celebration of my fabulous sister! This is the fourth *POPUPPARTY I've decorated and it is so easy and budget friendly. With the help of my lovely family, we were able to assemble and decorate in about an hour and a half!
Everything you need, you can find at papersource.com.
Balloons 
Black and white wrapping paper
Happy Birthday Banner
150 love notes (used as place cards)
Paper Straws and Gold Glitter tape (for straw flags)


I used strawberry tissue and searched "DIY tissue garland" on Pinterest.
C'est la Vie artwork from Feathered Arrow Press or Cotton and Birch Co.


Pin It

Monday, October 7, 2013

PIZZA PARTY


My son just turned 9!


I'm so excited and proud of him and the young man he is. 2 weeks ago when he said "I can't wait for my birthday party!!!" I realized I had made 0 preparation to celebrate this year. When I checked all of our offshore accounts and big time investments I calculated a healthy budget of between $50-$70.
Enter Pinterest. Search "boys birthday party ideas". Obsess for 3 days straight. Decide on Pizza making theme. Obsess for 3 more days. Hand write some pizza party invitations with red and green felt pens. What day is it? Oh man, now I only have a week! Re-enter Pinterest. Search "DIY...everything"


I made Chefs hats out of tissue and paper from Paper Source.


I uploaded some cool new fonts from www.dafont.com and made a birthday sign by printing oversized letters and then cutting and pasting (literally) on piece of cardstock. I used Maxwell's felt pens and freehanded a design similar to one I saw and loved on Pinterest. I backed it with left over black wrapping paper and placed it in my go to gold frame that I saved 2 years ago from the alley.


I purchased a roll of paper bag gift wrap and a roll of white gift wrap. One to cover the tables and the other to make random signs and to use for pictionary and a makeshift awning.

The treat bags were next. I used the same fonts and printed on lunch bags one at a time. The bags had some dollar store candy and fruit roll ups. I sealed them with red and white checked fabric tape from Paper Source to stick with the theme.


On to the awning! Measure the length you need to cover the chosen area then lay out the white roll wrap. With a sponge and some acrylic red paint, free hand some stripes. When it's dry, cut the edge to look like it's scalloped. This is where I leave you to figure out how to hang it. I'm sorry, I fought my fight, it's time to fight yours. It looked awesome from the front! From behind, it looked like death by packing tape.


Next challenge: rolling pins. Easy right? Wrong. I spent an entire day searching for rolling pins. The few that I found, were either 20$ wooden ones or $40 marble ones.  So we went to ACE Hardware and they cut down a couple of $6 dowels for a $3 charge. I sanded each 'pin' ,wrapped some of the checkered fabric tape around the edges et voila! Professional grade rolling pins for about a buck a piece!


A rice krispy cake is tradition in our house now. I decorated it with Fruit by the foot, a few skittles and a mini banner.


I found some easy Pictionary words for kids on line, printed them and threw them in a box. Everyone won a prize. Best pizza toss, best pictionary drawing, most creative pizza, etc. All the prizes were from the dollar store. I stayed on budget, including a sweet little gift for all the neighbors in our building who had to bear the noise of two kids birthday parties back to back in one afternoon. I purchased single serving bottles of red and white wine (cvs had them on sale 4 for $5) and attached a note saying "Pardon the noisy celebration blah blah blah". It was cute and no one complained:)


*guilt free style*
DO IT. LOVE IT.


Pin It